
Your pavers keep sinking because re-sanding only addresses surface symptoms, not the underlying cause. The real problem is almost always a failing base — poor compaction, inadequate depth, or compromised drainage that allows water to erode the subgrade and create voids beneath your pavers. Adding more sand can’t stabilize a foundation that’s already failing. Until you fix what’s happening beneath the surface, the sinking will keep coming back. Keep going to find out exactly what’s causing it and how to stop it permanently.
Key Takeaways
-
Re-sanding only addresses surface symptoms, not the failing base beneath your pavers causing repeated sinking.
-
Poor initial compaction during installation creates long-term instability that additional sand cannot fix.
-
Inadequate base depth fails to distribute weight effectively, leading to ongoing settlement.
-
Poor drainage saturates base layers, causing erosion, voids, and continuous paver displacement.
-
Widespread depression signals base failure requiring full excavation and rebuilding, not more sand.
The Real Reason Pavers Keep Sinking
Pavers don’t sink because they’re weak—they sink because the base beneath them fails. When the compacted gravel or crushed stone sub-base loses stability, the bedding sand above it shifts, and your pavers follow. Re-sanding the surface only addresses the symptom, not the structural cause.
The primary culprits include poor initial compaction, inadequate base depth, improper drainage, and soil erosion beneath the sub-base. Water is usually the driving force. When it infiltrates without a clear exit path, it displaces material, creates voids, and triggers movement. Effective sinking prevention means diagnosing what’s happening underground, not just what’s visible on the surface.
Proper paver maintenance starts with understanding this root cause. Regular cleaning and inspection of the pavers are essential to maintaining their integrity. Without fixing the base, you’ll reset the same pavers repeatedly.
Sand Alone Can’t Fix a Failing Base
When your pavers keep sinking, adding more sand to the joints won’t solve the problem.
The sand layer sits on top of the base, so it can’t correct a base that’s already shifting, eroding, or compacting unevenly beneath it.
You’re addressing a symptom while the real structural failure continues underneath. Additionally, without proper surface preparation steps, the issue is likely to persist despite re-sanding efforts.
Base Failure Causes Sinking
Sometimes the problem runs deeper than the surface. When pavers sink repeatedly, the base material is usually failing—not the sand layer above it. Re-sanding only addresses symptoms, not the structural cause beneath your feet.
Three conditions typically drive base failure:
-
Inadequate compaction — Loose base material shifts under load, creating uneven settlement.
-
Insufficient depth — Bases installed without proper thickness can’t distribute weight effectively.
-
Poor installation techniques — Skipping geotextile fabric or using the wrong aggregate allows soil migration and erosion.
Once the base compromises, pavers have nothing stable to rest on. Sand fills voids temporarily, but pressure and moisture continue destabilizing the foundation beneath.
Fixing this correctly means excavating, rebuilding the base to spec, and recompacting before any surface work begins.
Sand Doesn’t Stabilize Foundation
Adding sand on top of a failing base doesn’t fix the underlying problem—it just delays the next round of sinking.
Sand serves as a bedding layer, not a structural one. It’s designed to create a level surface for paver placement, not to compensate for a compromised sub-base beneath it.
When your foundation has eroded, compacted unevenly, or washed out, no amount of re-sanding restores foundation stability. The pavers will continue shifting because the load-bearing layer underneath can’t support them properly.
Paver maintenance that stops at surface-level sand application misses the root cause entirely.
To stop the cycle, you’ll need to excavate, reassess the sub-base, and rebuild it correctly before re-laying your pavers.
Sand belongs on a solid foundation—not in place of one.
How Poor Drainage Undermines Your Pavers
Poor drainage is one of the most destructive forces working against your paver installation. When water has nowhere to go, it saturates the base layers and destabilizes everything above.
Without proper water management, even a well-installed paver system will fail prematurely.
Here’s how poor drainage undermines your pavers:
-
Soil saturation — Excess water weakens the subgrade, causing it to shift and compress unevenly under load.
-
Base erosion — Water moving through your base material carries sand and aggregate away, creating voids beneath your pavers.
-
Freeze-thaw damage — Trapped moisture expands during freezing temperatures, forcing pavers upward and out of alignment.
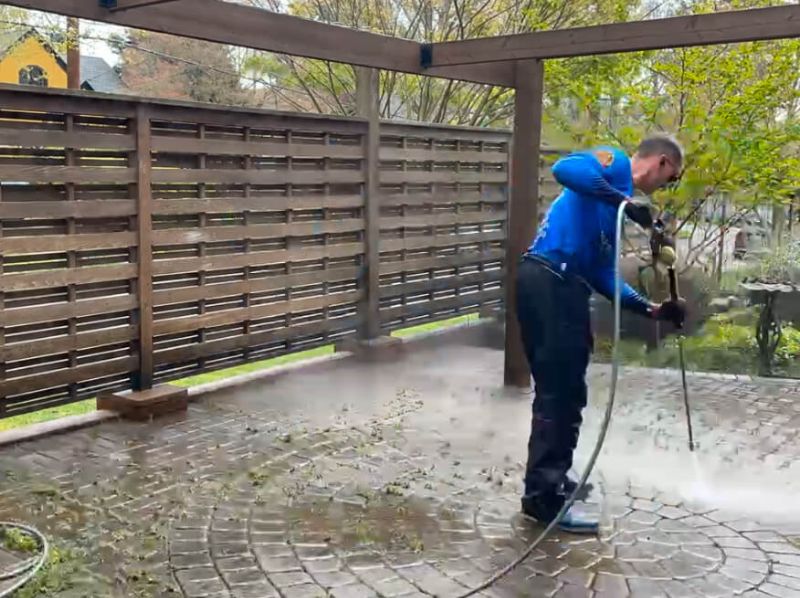
Investing in proper drainage solutions during installation or repair prevents recurring settlement. Regular maintenance, including pressure washing services to remove debris and improve drainage, can further enhance the longevity of your paver system.
Ignoring water management guarantees the same sinking problems will return.
Why DIY Re-Sanding Usually Makes It Worse
When you attempt to re-sand sinking pavers yourself, you’ll likely compound the existing problem rather than fix it.
Most DIYers reach for standard play sand or all-purpose sand instead of polymeric jointing sand, use inadequate compaction methods that leave the base unstable, and apply sand without properly seating it between joints.
These three mistakes—wrong sand type, insufficient base compaction, and improper jointing technique—accelerate settling and leave your pavers more vulnerable than before. Additionally, professional paver maintenance ensures proper assessment and application techniques, preventing further issues.
Wrong Sand Type Used
Most homeowners reach for regular construction sand or all-purpose sand when re-sanding their pavers, but this choice accelerates the problem rather than fixing it. Sand composition variations matter considerably—the wrong type washes out, compacts unevenly, or fails to lock joints together.
Regular sand fails because it:
-
Lacks binding agents, allowing water to displace it during rainfall.
-
Doesn’t resist weed germination or insect infiltration within joints.
-
Compacts inconsistently, creating pressure points that accelerate paver shifting.
Polymeric sand benefits your installation by incorporating silica particles and binding polymers that harden when activated with water. This creates a semi-rigid joint that resists erosion, pests, and lateral movement.
Using the correct sand type isn’t optional—it’s foundational to a stable, long-lasting paver surface.
Inadequate Base Compaction
Even with the right sand in place, your pavers will keep sinking if the base material beneath them wasn’t properly compacted from the start. Compaction creates the structural foundation that holds everything above it stable.
Without it, weight and moisture gradually push materials downward, causing repeated settlement no matter how many times you re-sand.
Proper compaction methods require mechanical plate compactors run in multiple passes across the base layer. Hand tamping simply doesn’t generate enough force to achieve adequate density.
Most DIY re-sanding projects skip this step entirely because it requires equipment rental, excavation, and resetting affected pavers from scratch.
Adding sand on top of a poorly compacted base only delays the problem. You’re filling a symptom while the actual structural deficiency continues working against you underground.
Improper Jointing Technique
Improper jointing technique is where most DIY re-sanding attempts stop being a solution and start becoming a setback. Without correct installation techniques, you’re fundamentally accelerating the same failure you’re trying to fix.
Three critical mistakes destroy joint stability:
-
Using regular sand instead of polymeric sand, which washes out immediately under rain or irrigation.
-
Applying sand to damp joints, preventing proper compaction and adhesion.
-
Skipping the plate compactor pass, which forces sand deep into joints rather than leaving it sitting on the surface.
Each mistake leaves joints vulnerable to erosion, weed intrusion, and continued paver movement.
You end up re-sanding the same area repeatedly without ever addressing why the joints keep failing.
When to Replace the Base vs. Re-Sand
When pavers keep sinking despite repeated re-sanding, the problem likely runs deeper than the surface. Re-sanding only makes sense when your base remains structurally sound and the settling is minor.
If you’re seeing widespread depression, recurring low spots, or sections that shift underfoot, you’ll need to excavate and rebuild from scratch.
Replacing the base means removing your pavers, pulling out the failed material, and re-evaluating your base material options—whether that’s crushed stone, compacted gravel, or a concrete sub-base depending on load requirements. Proper paver installation demands a minimum four-inch compacted base for pedestrian areas and six inches or more for driveways.
Don’t waste money re-sanding a compromised foundation. Diagnosing the actual failure point first saves you from repeating the same costly, frustrating cycle. Additionally, paver sanding helps maintain stability, so understanding your base’s condition is crucial.
How Professional Paver Restoration Solves It for Good
Diagnosing the failure point is half the battle—executing the fix correctly is the other half, and that’s where professional paver restoration delivers results that DIY repairs rarely match.
Professional techniques address root causes, not symptoms, giving you lasting stability instead of a temporary patch.
A complete restoration typically involves:
-
Full base assessment — identifying compaction failures, drainage deficiencies, or undersized aggregate layers
-
Systematic reinstallation — re-grading, recompacting, and resetting pavers to precise tolerances
-
Polymeric sand application — locking joints against washout and weed infiltration permanently
The paver restoration benefits extend beyond aesthetics.
You’re protecting your investment, preventing accelerated surface wear, and eliminating recurring repair costs. Additionally, effective concrete cleaning techniques help maintain the overall integrity of the surrounding surfaces.
Professionals bring the equipment, materials, and diagnostic experience to guarantee the problem stays solved.
Frequently Asked Questions
How Long Does a Professionally Installed Paver Base Typically Last?
A professionally installed paver base typically lasts 25–50 years when you use proper paver installation techniques and quality base material options like compacted gravel and crushed stone, ensuring long-term stability beneath your pavers.
Can Tree Roots Cause Pavers to Sink Over Time?
Yes, tree root intrusion absolutely causes your pavers to sink over time. As roots expand beneath the surface, they displace your base material, triggering soil erosion and creating voids that destabilize your entire paver installation progressively.
Does Homeowners Insurance Cover Sinking or Damaged Paver Repairs?
Most homeowners insurance policies don’t cover sinking pavers unless a covered peril, like sudden damage, caused it. You’ll typically need to absorb repair costs yourself, so review your insurance policy carefully for exclusions.
What Paver Materials Hold up Best in Portland’s Rainy Climate?
For Portland’s rainy conditions, you’ll find concrete pavers, natural basalt, and porcelain perform best. These paver materials resist moisture absorption, minimize freeze-thaw cracking, and maintain structural integrity, making them ideal choices for the Pacific Northwest’s wet climate.
How Soon After Installation Should Pavers Be Sealed?
Wait at least 90 days before applying paver sealing techniques to new installations. This ideal sealing time lets pavers settle, efflorescence dissipate, and joint sand stabilize, ensuring you’ll achieve maximum adhesion and long-lasting protection.
Conclusion
Sinking pavers aren’t a sand problem — they’re a foundation problem. Until you correct the drainage, compact the base properly, and address what’s actually causing the movement, you’ll keep repeating the same temporary fix. Re-sanding masks the symptom while the real damage worsens underneath. If your pavers have sunk more than once, you’ve already passed the point where surface-level solutions work. Get the base assessed by a professional before the structural deterioration spreads further.