
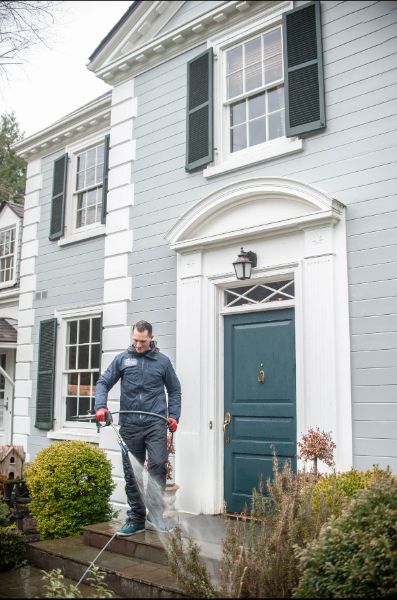
Yes, you should always pressure wash your house before painting it. Contaminants like dirt, mildew, and oxidation prevent paint from bonding properly to the substrate. When you skip this step, paint adheres to those contaminants instead — leading to peeling, bubbling, and premature failure. Even high-quality paint won’t save a poorly prepared surface. Everything from detergent selection to drying time plays a bigger role in your paint job’s success than most homeowners realize.
Key Takeaways
-
Pressure washing before painting is essential, as it removes dirt, mildew, and oxidation that would otherwise prevent proper paint adhesion.
-
Skipping pressure washing causes paint to bond with contaminants instead of the surface, leading to peeling, bubbling, and premature failure.
-
A clean surface creates a mechanical bond between paint and substrate, improving finish quality and extending the paint’s lifespan.
-
After pressure washing, wait 24–48 hours before painting to ensure the surface is fully dry and ready for proper adhesion.
-
Professionals charge $150–$400 for pressure washing, while DIY equipment rental costs $50–$100 per day, though skill impacts effectiveness.
Does Your House Need to Be Pressure Washed Before Painting?
Whether you’re painting a new coat over weathered siding or revitalizing trim that’s seen better days, surface preparation is the most critical step you can’t afford to skip.
Dirt, mildew, chalking paint, and oxidation all compromise paint adhesion, causing your new coat to peel, bubble, or fail prematurely. Pressure washing removes these contaminants efficiently and thoroughly, giving your fresh paint a clean, stable surface to bond with.
Most professional painters won’t apply a single drop of paint without pressure washing first — and for good reason.
Skipping this step means you’re painting over a compromised substrate. Regardless of how high-quality your paint is, improper surface preparation will undermine your results every time.
Pressure washing isn’t optional; it’s foundational.
What Happens When You Skip Pressure Washing Before Painting?
Skipping pressure washing doesn’t just leave your surface a little dirty — it sets your entire paint job up to fail.
When you apply paint over dust, mildew, chalk, or grease, you’re fundamentally bonding the paint to contamination rather than the substrate itself.
Paint adhesion breaks down faster under these conditions, leading to peeling, bubbling, and flaking within months instead of years.
No amount of premium paint compensates for poor surface preparation.
The coating needs a clean, stable surface to grip — without it, you’re wasting material and labor.
You’ll also void most manufacturer warranties if surface preparation standards aren’t met.
What looks like a shortcut today becomes a costly repaint job far sooner than it should.
Don’t skip this step.
How Pressure Washing Helps Paint Stick and Last Longer
When pressure washing removes contaminants from a surface, it exposes the raw substrate and gives paint something solid to bond to. Proper surface preparation eliminates oils, mildew, chalking, and loose paint that would otherwise prevent full paint adhesion.
Without these barriers, primer and topcoat penetrate the substrate more effectively, creating a mechanical bond that resists peeling, bubbling, and cracking.
You’ll also notice a significant difference in finish quality. Paint applied to a clean surface cures more evenly, maintains consistent sheen, and holds color longer under UV exposure and moisture.
Skipping this step forces the coating to bond with contaminants instead of the actual surface, shortening its lifespan considerably. Pressure washing isn’t optional — it’s a foundational step that directly determines how long your paint job performs.
Signs Your Home Definitely Needs Pressure Washing First
Before you rent equipment or mix primer, look at the surface itself — it’ll tell you exactly what needs to happen next.
Visible mold, mildew staining, or dark streaking across siding signals that mold removal isn’t optional — it’s a prerequisite. If you see peeling or bubbling paint, that indicates moisture trapped beneath the surface, which pressure washing can expose and eliminate.
Chalky residue that transfers onto your fingers means oxidized paint is compromising adhesion. Heavy dirt, bird droppings, or cobwebs embedded in crevices will prevent primer from bonding correctly.
Proper surface preparation demands a clean, dry, stable substrate — and your eyes can confirm whether you’ve achieved that. If any of these conditions exist, pressure washing before painting isn’t a suggestion; it’s mandatory.
How Long After Pressure Washing Can You Paint?
After pressure washing, you’ll need to wait at least 24 to 48 hours before applying paint, though some professionals recommend up to 72 hours for porous surfaces like wood.
Several factors directly influence how quickly your surface dries, including ambient temperature, humidity levels, direct sunlight exposure, and the material composition of your exterior.
You can accelerate drying time by washing on a warm, low-humidity day, but never rush the process — painting over residual moisture will cause adhesion failure and premature peeling.
Recommended Drying Time
Drying time after pressure washing is one of the most critical factors that determines whether your paint job will succeed or fail.
You’ll typically need to wait 24–48 hours before applying paint, though drying techniques and ideal conditions greatly affect this window.
Key factors influencing drying time include:
-
Temperature: Surfaces dry faster in warm temperatures (above 50°F)
-
Humidity: High humidity slows evaporation, extending your wait time
-
Sunlight exposure: Direct sun accelerates surface drying considerably
-
Surface material: Wood retains moisture longer than vinyl or masonry
Don’t rush this process.
Painting over a damp surface traps moisture beneath the coating, causing peeling, bubbling, and premature failure.
Use a moisture meter to confirm your surface has reached an acceptable moisture level before you begin painting.
Factors Affecting Drying Speed
Several variables work together to determine how quickly your pressure-washed surface dries, and understanding them lets you plan your project more efficiently.
Humidity levels directly slow moisture evaporation, making high-humidity days problematic for scheduling. Temperature variations matter equally—cooler air retains moisture longer, extending drying times considerably.
Different surface materials absorb and release water at different rates; wood dries slower than vinyl or concrete. Weather conditions like cloud cover and wind speed further influence evaporation rates.
Your chosen paint type also dictates acceptable moisture thresholds before application. Oil-based paints tolerate slightly more residual moisture than latex varieties.
Some professionals apply drying agents to accelerate surface preparation when tight project timelines exist. Monitoring these factors collectively gives you an accurate drying window rather than relying on guesswork.
How to Pressure Wash Your House Before Painting
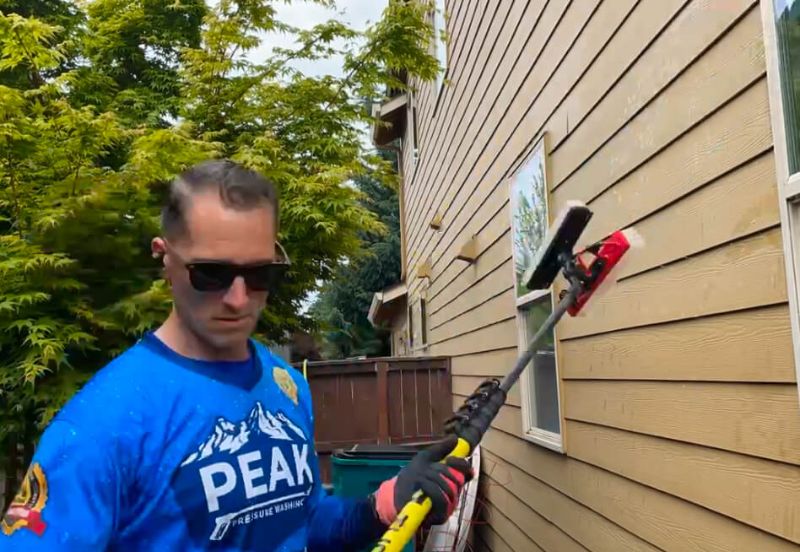
Before you begin pressure washing your house, gather the right equipment: a pressure washer with adjustable PSI settings, appropriate nozzles, safety goggles, and a cleaning detergent formulated for exterior surfaces.
Once you’ve set up your equipment, apply the detergent evenly across the surface using a low-pressure nozzle or a detergent injection system, working in sections to prevent it from drying before you rinse.
Consistent, even coverage guarantees that dirt, mildew, and chalking paint break down properly, giving you a clean surface that’ll hold fresh paint effectively.
Gather Necessary Equipment
Gathering the right equipment before you start pressure washing will save you time and prevent unnecessary interruptions mid-job. Assemble everything beforehand so you can work efficiently and safely.
Here’s what you’ll need:
-
Pressure washer: Use a unit with 1,500–3,000 PSI for exterior house surfaces
-
Safety gear: Wear waterproof gloves, safety goggles, and non-slip boots to protect yourself from high-pressure spray
-
Extension wand: Helps you reach eaves, soffits, and upper story walls without ladders
-
Cleaning detergent: Choose a solution formulated specifically for exterior siding
Check that your pressure washer connections are tight and your hoses are free of kinks before starting.
Faulty equipment mid-job creates delays and potential hazards you don’t want dealing with.
Apply Detergent Evenly
Applying detergent to your house before rinsing is a 2-step process that starts with switching your pressure washer to low pressure and attaching the soap nozzle—typically a black tip.
Choose your detergent types carefully; house wash concentrates work best for general grime, while mildew-specific formulas tackle biological growth more effectively.
For application techniques, work from the bottom up to prevent streaking. Apply the detergent in overlapping passes, maintaining a consistent distance of 12–18 inches from the surface.
Let the solution dwell for 5–10 minutes—don’t let it dry. You’ll want to keep the nozzle moving steadily to guarantee even coverage across all surfaces.
Pay extra attention to corners, soffits, and textured areas where buildup concentrates.
Should You Hire a Pro or DIY the Pressure Washing?
Whether you tackle pressure washing yourself or hire a professional comes down to your comfort level with the equipment, the size and complexity of the job, and your budget.
Consider these factors before deciding:
-
Cost comparison: Renting equipment runs $50–$100/day; professional services typically cost $150–$400, depending on home size.
-
Safety considerations: High-pressure water can cause serious injury and surface damage if mishandled—pros carry liability insurance.
-
Skill level: DIY works well for single-story homes with straightforward surfaces; multi-story or delicate siding demands professional expertise.
-
Time investment: Professionals complete the job faster and more efficiently, letting you focus on coordinating the painting project.
Weigh these points carefully—the wrong choice can delay your paint job or create costly repairs.
Frequently Asked Questions
Can Pressure Washing Damage Older or More Delicate Siding Materials?
Yes, pressure washing can damage older or more delicate siding materials. You’ll risk splintering wood, cracking vinyl, or compromising paint adhesion if you’re not careful with the pressure settings and technique.
Does Pressure Washing Remove Old Paint Before a Fresh Coat?
Yes, pressure washing can remove loose, peeling, or flaking old paint, making it an essential step in surface preparation. It’ll improve paint adhesion by ensuring you’re applying a fresh coat onto a clean, stable surface.
What PSI Setting Is Safest for Residential House Washing Purposes?
For residential house washing, you’ll want to stay between 1,200-1,500 PSI. Maintain an ideal distance of 12-18 inches from surfaces, and always follow proper safety precautions to prevent damage to siding, trim, and painted surfaces.
Can You Paint Over a House Without Pressure Washing It?
You can paint over a house without pressure washing it, but you’ll compromise paint adhesion. Proper surface preparation is essential—skipping this step means dirt, mildew, and debris will prevent paint from bonding effectively to your exterior surfaces.
Does Pressure Washing Help Identify Hidden Damage Before Painting Begins?
Yes, pressure washing reveals hidden issues like rot, cracks, and loose paint during surface preparation. You’ll spot damage that’s invisible under dirt, letting you address structural problems before painting begins, ensuring a longer-lasting finish.
Don’t Skip Prep—Clean Surfaces Are the Foundation of a Lasting Paint Job
Skipping pressure washing before painting is one of the fastest ways to waste time and money. Dirt, mildew, and chalky residue prevent paint from bonding properly, leading to peeling, uneven coverage, and premature failure. A properly cleaned surface gives your paint the solid foundation it needs to adhere, last longer, and look better.
Whether you choose to DIY or hire a professional, the key is doing it thoroughly and letting everything dry completely before painting. If you want to avoid guesswork and ensure the surface is prepped correctly, professional cleaning can make a big difference. Peak Pressure Washing provides pre-paint exterior cleaning tailored to different materials, helping you get the most out of your next paint job. Request a free quote today and start your project the right way.